


Project List Help
Project Lists give you the ultimate way to store and organise your projects.
Whether you are looking to create a complex project across multiple phases with hundreds of references, or just a simple list of 5 references, project lists give you privileged access to Hager specification data.
The information below will help you to understand the basics of creating your first Project List along with some more of the advanced features and outputs you can create.
Alternatively download the help documentation (ZIP, 3,7 MB) which has examples of the CSV file structure for importing part references.
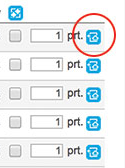
Add to project list button.
- Downloading relevant documentation
- Comparing products against one another
- Store projects in ordered lists
- Export project lists for use with a customer
You can add products to your project list either by checking the product you wish to include on their product pages in the E-Catalogue, or by importing them from a CSV file.
After creating a project list you can export data sheets and downloads into one ZIP file or you can export your list to show product profiles to your customers.
Importing products to a project list can be done in a variety of ways:
- Import from E-Catalogue
- Import from a CSV file
- Import from an existing project list
You must be logged in
1 – Go to the product page of the reference you require
2 – You can add individual products one at a time by pressing the project list button (a wizard will launch to guide you through the process)
3 – Name your project list
4 – Add all products into you project
1 – Copy the product references from your document/ quotation tool
2 – Open Excel and paste special, selecting the text option from the pop-up
3 – You must then format your Excel spreadsheet like the example to the right
4 – Save the file as a ‘Windows Comma Separated (.csv)’
2 – Open Excel and paste special, selecting the text option from the pop-up
3 – You must then format your Excel spreadsheet like the example to the right
4 – Save the file as a ‘Windows Comma Separated (.csv)’
Format your Excel / CSV like this:
Importing your .csv file.
1 – When in the Project List Overview, click “Start Import” from the grey menu on the left. A pop-up will appear
2 - Work through the questions, selecting the appropriate answers
3 – Press “import selected projects / products” and your references should now be included in the project.
Note: We have provided a correctly formatted .csv file to help you. (CSV, 74 Bytes)
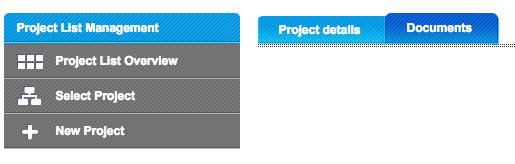
To view your Project List go to the header bar at the top of the webpage and click on “My Projects”, then click on the relevant title from the list.
You will be taken to the Project List overview page:
1 – Click on the relevant project list
2 – You should now be able to see your products in the list.
You will be taken to the Project List overview page:
1 – Click on the relevant project list
2 – You should now be able to see your products in the list.
 Downloads include:
- Catalogue Chapters
- Catalogue Pages
- Directive RoHs
- Product data sheets
- Instruction Manuals
- & more
After you have added all of the products into your project list you can extract all of the downloads related to these product into one ZIP file.
1 - Once you are viewing your project list you need to click the “Documents" tab next to the “Project Details” tab
2 – Click select all and click download, alternatively select the file types you want and click download
Exporting your project list into PDF format.
1 – When in the desired project, tick the project details as seen below
1 – When in the desired project, tick the project details as seen below
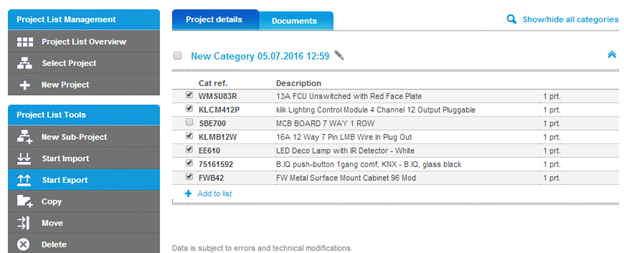
2 – Next, click “Start Export” on the left hand menu, a pop-up will appear.
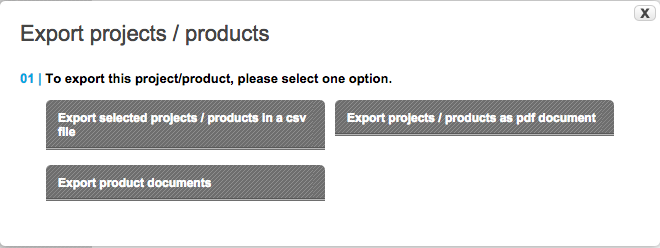
3 – You will have 3 options:
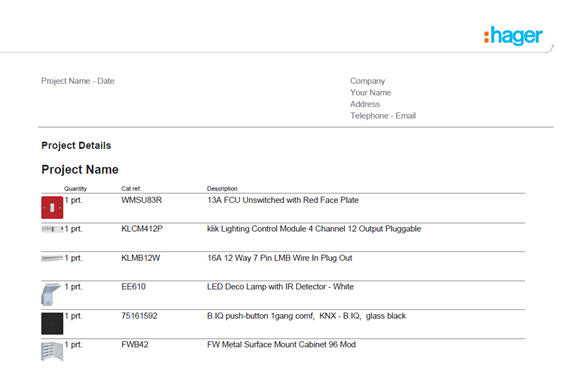
5 – Below you can see an example of what the PDF will look like
3 – You will have 3 options:
- Export to CSV
- Export to PDF
- Export product documentation
5 – Below you can see an example of what the PDF will look like
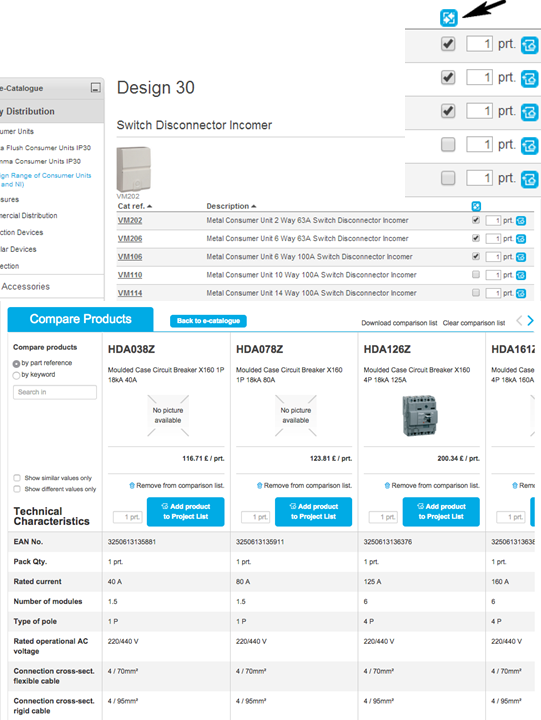
Comparing products technical attributes
This is the compare button.
This will bring up a window with all of the technical attributes next to each other for you to compare the differences.
Additionally this can also be downloaded as a PDF for sharing with customers.